Part 3: Adding Sections to the VTEX Headless CMS
caution
This tutorial is intended for those who started their FastStore project with the Store Components starter. If you started your project with the Base Store starter, please refer to this tutorial.
Introduction
In this part of this tutorial, you'll learn how to make your components available at the VTEX Headless CMS by writing the schemas that describe your frontend components.
Declaring Section schemas
A schema is written in JSON Schema v6, a description language for creating forms, and rendered as a react-jsonschema-form in the VTEX Headless CMS.
To define a schema, you must first import the Schema object from @vtex/gatsby-plugin-cms in the src/@vtex/gatsby-plugin-cms/index.ts and then declare your components as in the following example:
import { Schema, BuilderConfig } from '@vtex/gatsby-plugin-cms'

const AwesomeComponent: Schema = {
    title: 'My local component',
    description: 'Change this description on your src/gatsby-plugin-cms-index.js',
    type: 'object',
    properties: {
      prop1: {
        title: 'Default value for prop1',
        type: 'string',
      },
      prop2: {
        title: 'Default value for prop2',
        type: 'string',
      },
    },
  },
Notice that each component will present a unique structure. However, you'll always need to define at least the following values:
| Key | Description |
|---|---|
title | The name that identifies your component in the CMS interface. |
description | A brief description to help editors understand the behavior of your component. |
type | The data type of your schema. Possible values are string, object, array, number, integer, boolean. |
Now, depending on the type of your schema, you may need to define particular fields related to your component structure. For example, for a schema of the object type, you'll need to determine properties that map key-value pairs. For a schema of the array type, you'll need to define the items of that array.
For more information on each property, check the JSON Schema Reference.
💡 A helpful feature to write your schema is the
react-jsonschema-formPlayground. This Playground allows you to visualize and validate the React form corresponding to your JSON Schema.
Using widgets
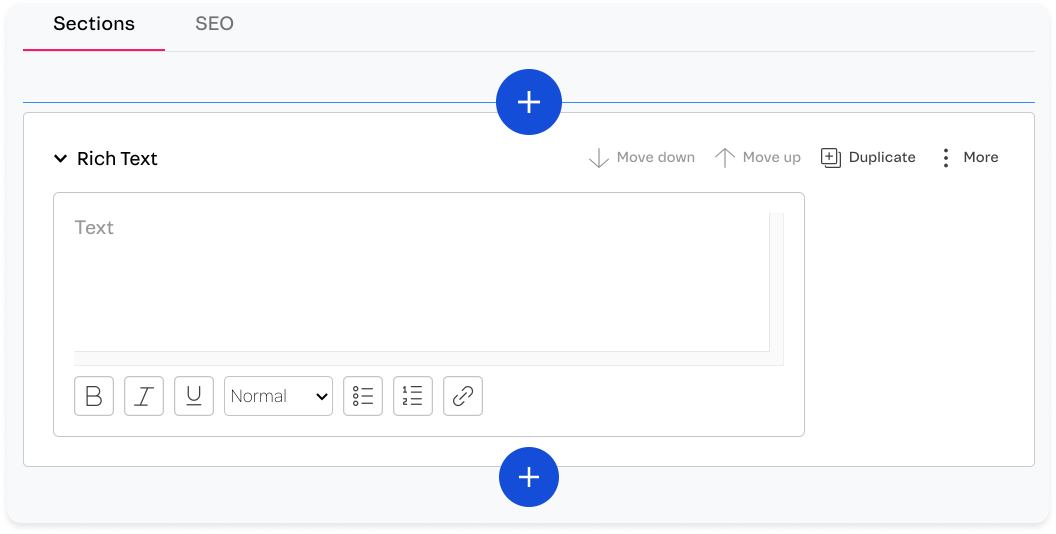
When defining your Schema, you can also use the uiSchema along with widgets to specify which UI widget should be used to render a given field of your schema. Common widgets are draftjs-rich-text, image-uploader, and block-select.
Check the following example of the draftjs-rich-text component being used.
- Code
- CMS
const RichTextComponent: Schema = {
    title: 'Text',
    type: 'object',
    properties: {
        content: {
          type: 'string',
          title: 'Text',
          widget: {
            'ui:widget': 'draftjs-rich-text', // custom widget to render the component
          },
        },
    },
},

Exporting Sections
To export our schemas, we must declare them inside the blocks property of the builderConfig object.
import { Schema, BuilderConfig } from '@vtex/gatsby-plugin-cms'

export const builderConfig: BuilderConfig = {
  blocks: {
    // your sections
    AwesomeComponent
  },
  contentTypes: {
    // your content types
    home: {
      name: 'Home Page',
      extraBlocks: {},
    },
  },
  messages: {
    // your translation keys
  },
}
Now, if you start creating a new Home Page in the VTEX Headless CMS app and click on the + sign, you will see your AwesomeComponent available.
